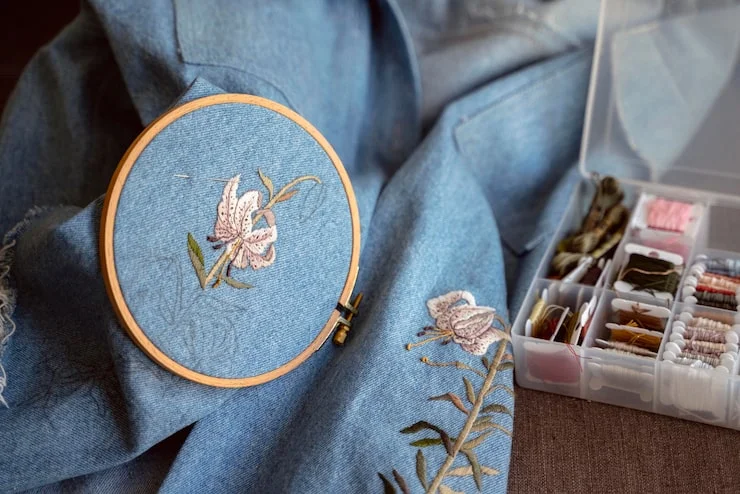
Embroidery on clothes turns a plain t-shirt, a pair of jeans, or a simple tote bag into something that is truly yours. You do not need a sewing machine. You do not need years of practice. You need a needle, some thread, a piece of clothing, and a little patience. That is it.
This guide walks you through every part of the process. We will talk about what supplies to buy, which stitches to learn first, how to get your design onto the fabric, and how to keep your finished work looking good after many washes. By the end, you will have everything you need to know diy embroidery on clothes for beginners.
Why Embroidery On Clothes Is A Good First Project?
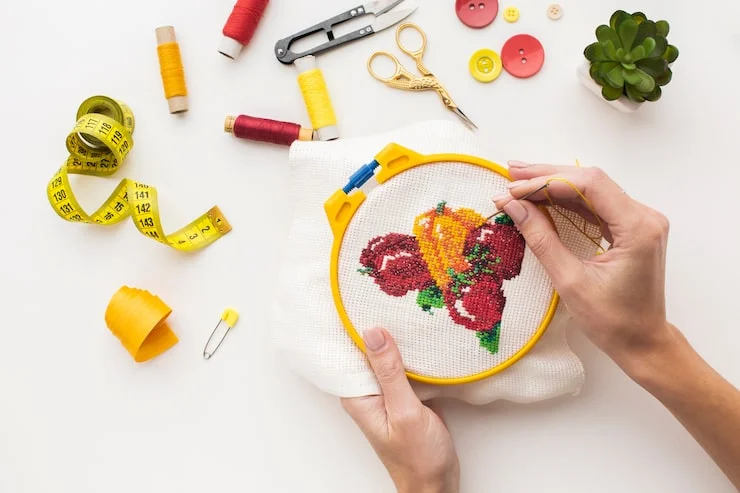
Many people think embroidery is hard. They picture tiny, perfect stitches made by someone with steady hands and years of experience. That picture is not the full story.
Embroidery on clothes is actually one of the easiest ways to start. The fabric is already there. You are not building something from nothing. You are adding a small detail to something you already own. That makes the whole process feel less scary.
There is another reason to start with clothing. When you wear something you embroidered yourself, people notice. They ask about it. You get to say, "I made that." That feeling never gets old.
What You Need To Get Started?
You do not need a big, expensive kit. You need a few basic items. Here is what actually matters.
Embroidery needles. These have a large eye so you can thread multiple strands of floss. They also have a sharp point so they go through woven fabric without too much effort. A small pack of assorted sizes will last you a long time. Needles bend and disappear, so having extras is smart.
Embroidery floss. This is the thread you stitch with. It comes in small skeins and hundreds of colors. For your first project, pick two or three colors that you like. DMC is a common brand that many beginners use.
A small pair of scissors. You need something sharp with fine tips. These are for cutting thread only. Do not use them on paper, because paper dulls the blades quickly. A dedicated pair of embroidery scissors will stay sharp for years if you treat them right.
An embroidery hoop. This is a ring that holds your fabric tight while you stitch. It keeps the fabric from bunching up. A six-inch hoop is a good size for most small designs on clothing.
A way to mark your fabric. You need something to draw your design onto the cloth. A water-soluble marker is the best choice for beginners. These markers make clear lines, and the marks disappear when you rinse the fabric in water.
The clothing item. Start with something simple. A plain cotton t-shirt is perfect. Denim is also good because it is sturdy. Avoid stretchy, thin fabrics at first, because they are harder to work with.
That is the whole list. You do not need a light box or a fancy stand. You do not need every color of thread. You need the basics, and you need to start.
Read Also: Thrift Flip Ideas For Beginners
Learning The Basic Stitches
You can embroider almost anything with just a few stitches. Here are the ones you should learn first. Practice each one on a scrap piece of fabric before you use it on your clothes.
Running Stitch
This is the simplest stitch. You bring the needle up through the fabric, then go back down a short distance away. Then you bring the needle up again a short distance from where you went down. You repeat this along your line.
The stitches should be the same length. If you keep them even, the line looks clean and neat. Running stitch works well for outlines, dotted lines, and simple borders.
Back Stitch
Back stitch makes a solid, continuous line. It looks like a machine-sewn line of stitches. This is the stitch you will use most often for lettering and outlines.
Here is how it works. You bring the needle up through the fabric. Then you go back down at the starting point of your line. Next, you bring the needle up a short distance ahead of your first stitch. Then you go back down at the end of the first stitch. You keep going like this, always going back to fill in the gap.
It feels a little backward at first. That is normal. Once you do it a few times, it becomes automatic.
Satin Stitch
Satin stitch fills in an area with smooth, flat stitches. It is what you use when you want a solid block of color.
You bring the needle up on one side of the shape. You go down on the other side. Then you come back up right next to where you started, and go down right next to where you just ended. You keep doing this, placing each stitch right beside the last one, until the whole shape is filled.
The goal is to have no gaps between the stitches. They should sit side by side like a row of books on a shelf.
Lazy Daisy Stitch
This stitch makes a loop that looks like a flower petal. It is perfect for small floral designs.
You bring the needle up through the fabric. Then you go back down in almost the same spot, leaving a loop of thread on the surface. You bring the needle up again a short distance away, catching that loop. Then you go back down on the other side of the loop to hold it in place.
You can make the loops tiny or long. You can use them as petals, leaves, or even little raindrops.
French Knot
French knots are small, raised dots. They add texture and detail. You will see them used for flower centers, animal eyes, and little accents.
You bring the needle up where you want the knot. Then you wrap the thread around the needle two or three times. You hold the wraps tight against the fabric and put the needle back down right next to where it came up. You pull the thread through while holding the knot in place.
It sounds fiddly, but it is not hard once you try it. The first few might look messy. That is fine. Keep going.
How To Get Your Design Onto The Fabric?
You have your stitches. You have your clothing. Now you need a design on the fabric so you know where to stitch. Here are the easiest ways to do it.
Using A Water-Soluble Marker
This is the simplest method for most beginners. You print or draw your design on a piece of paper. Then you place the paper against a window or use a light box. You put your fabric over the paper and trace the lines with your water-soluble marker.
The marker lines show through the fabric if the fabric is light enough. If your fabric is dark or thick, this method will not work well. For those fabrics, try a different approach.
Using Tracing Paper
For darker or thicker fabrics, tracing paper is a good option. You trace your design onto the tracing paper with a pencil. Then you pin or baste the tracing paper onto your fabric. You stitch right through the paper and the fabric. When you are done, you tear the paper away.
The stitching acts like a perforation, so the paper tears along the stitched lines. You might need tweezers to pull out small bits of paper stuck under the stitches.
Using A Water-Soluble Stabilizer
This is a sticky, clear film that you place on top of your fabric. You stitch your design right through it. When you are finished, you run the fabric under water and the stabilizer dissolves completely.
This works well on dark fabrics and on materials that are hard to mark, like fleece or knits. It costs a little more than other methods, but it is very forgiving.
Picking The Right Clothing And Placement
Not all clothes are equally easy to embroider. Here is what to look for.
Cotton t-shirts are great for beginners. The fabric is soft but stable. It holds stitches well. Just avoid the ribbed collar area, because the thickness makes it hard to push the needle through.
Denim jeans and jackets are also good. Denim is sturdy and the stitches disappear into the fabric nicely. The main challenge is the seams and thick areas. Stay away from pockets and belt loops for your first project.
Sweaters and knits are trickier. The fabric stretches. When you stitch on a stretchy fabric, the stitches can pull and pucker. If you want to try a knit, use a stabilizer behind the fabric to keep it from stretching too much.
Where to place your design. Start with a small area. The chest of a t-shirt, the front of a tote bag, or the ankle of a pair of jeans are all good spots. Avoid areas that rub against things all day, like the inside of a sleeve or the seat of pants. Friction wears down stitches over time.
Step-By-Step: Your First Embroidery Project
Let us put it all together. Imagine you want to embroider a small flower on the chest of a cotton t-shirt.
Step one: Prepare your design. Find a simple flower pattern online or draw a small flower on paper. Keep it small for your first project. A design that fits inside a three-inch circle is diy embroidery on clothes for beginners.
Step two: Transfer the design. Place your paper design on a window. Tape it so it does not move. Put your t-shirt over it, positioning the flower where you want it. Trace the lines with your water-soluble marker. If the lines are faint, go over them again.
Step three: Put the fabric in the hoop. Open your embroidery hoop. Place the fabric over the smaller ring, then press the larger ring down over it. Tighten the screw at the top. The fabric should be tight like a drum, but not stretched so much that it distorts the shape of the shirt.
Step four: Start stitching. Thread your needle with two or three strands of floss. Tie a small knot at the end. Bring the needle up from the back of the fabric at the starting point of your design.
Use lazy daisy stitches for the petals. Use a French knot for the center of the flower. Use a back stitch for the stem and leaves.
Step five: Finish and secure. When you are done stitching, bring the needle to the back of the fabric. Make a small knot or weave the thread through a few stitches to secure it. Cut the thread, leaving a short tail.
Step six: Remove the marker lines. Run the embroidered area under cool water. The water-soluble marker lines will disappear. Let the shirt air dry flat.
That is it. You just embroidered a shirt.
Common Mistakes And How To Fix Them
Every beginner makes mistakes. Here are the ones you are most likely to run into, and what to do about them.
Your stitches are loose and saggy. This usually means your fabric was not tight enough in the hoop. Tighten the hoop before you start. If the stitches are already done, you can sometimes gently pull the fabric from the back to tighten them, but it is easier to just start with a tight hoop.
The fabric puckers around your stitches. This happens when you pull your thread too tight. The thread should lie flat on the fabric, not dig into it. Pull gently and let the thread rest naturally. Puckering also happens on stretchy fabrics without a stabilizer.
Your thread keeps tangling. Cut your thread to a shorter length. About eighteen inches is a good maximum. Longer thread tangles more easily. Also, let the needle hang freely sometimes so the thread can untwist.
You cannot see your design lines. If you used a water-soluble marker on dark fabric, the lines might be invisible. Next time, use a water-soluble stabilizer instead. You can stitch right through it and then dissolve it away.
The back of your work looks messy. The back of embroidery is never as neat as the front. That is normal. But you can keep it tidier by not making big jumps with your thread. Finish one area, tie off, and start a new thread for the next area.
Read: Easy DIY Fabric Flower Brooch Ideas For Sarees
How To Care For Your Embroidered Clothes?
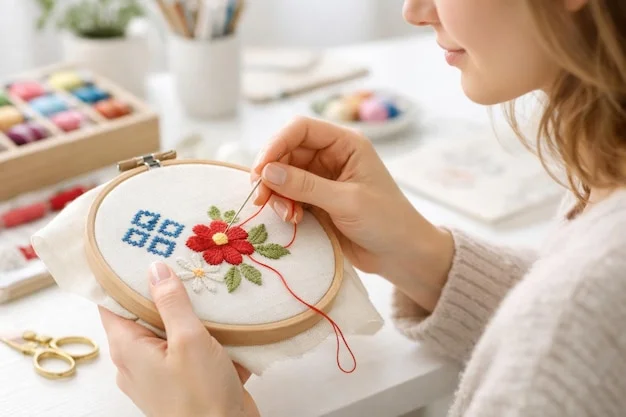
You put hours into this. You want it to last. Here is how to wash and dry embroidered clothing so it stays looking good.
Turn the garment inside out before washing. This protects the stitches from rubbing against other clothes in the wash.
Wash in cool water. Hot water can cause some threads to bleed or fade. Cool or warm water with a mild detergent is best. Do not use bleach.
Do not wring or twist the fabric. Squeeze gently to remove excess water. Wringing can distort the stitches and stretch the fabric.
Air dry flat or hang to dry. Do not put embroidered clothing in the dryer. The heat and the tumbling can damage the thread. Lay the garment flat on a towel or hang it on a line.
Iron on the reverse side. If you need to iron the garment, turn it inside out. Never put the iron directly on the embroidery. The heat can flatten the stitches or scorch the thread.
Follow these steps and your embroidery will outlast the shirt itself.
Ideas For What To Embroider
Once you finish your first project, you will want to do more. Here are some ideas that work well for beginners.
- Small flowers. A single flower on a pocket or collar adds a nice detail without taking hours. Use lazy daisy stitches for petals and a French knot for the center.
- Initials or a short word. Back stitch is perfect for lettering. Keep it simple. One or two letters is plenty for a first attempt at text.
- A small heart or star. These shapes use only two or three stitches. They are quick and satisfying.
- A border along a hem or sleeve. Running stitch in a contrasting color makes a simple, clean border.
- A tiny motif on a tote bag. Tote bags are easy to work with because the fabric is flat and stable. They also make great gifts.
Frequently Asked Questions
How long does it take to embroider a small design?
A simple flower or a few letters might take one to two hours. A larger design could take several evenings. Speed comes with practice.
Can I embroider on stretchy fabric?
Yes, but use a stabilizer behind the fabric. The stabilizer keeps the fabric from stretching while you stitch.
What if I make a mistake?
You can undo stitches with a small pair of scissors or a seam ripper. Pull the thread out gently and start again. It happens to everyone.
Do I need to pre-wash the clothing first?
It is a good idea. If the garment shrinks after you embroider it, the stitching will pucker. Wash and dry the item before you start stitching.
Can I use regular sewing thread?
You can, but embroidery floss is better. It is thicker and comes in many more colors. Sewing thread is thin and does not cover the fabric as well.
How do I keep the back of my work neat?
Do not worry too much about the back. Focus on the front. But you can avoid long jumps between stitches. Finish one area, secure the thread, and start fresh for the next area.
Conclusion
Embroidery on clothes is not complicated. It is just a needle, some thread, and a little time. You do not need talent. You need patience and a willingness to make a few messy stitches before they start looking good.
Start with a plain t-shirt and a simple design. Learn one stitch at a time. Do not worry about making it perfect. The small imperfections are what make handmade things special.
Other Articles
Upcycled Coffee Mug with Cricut Joy