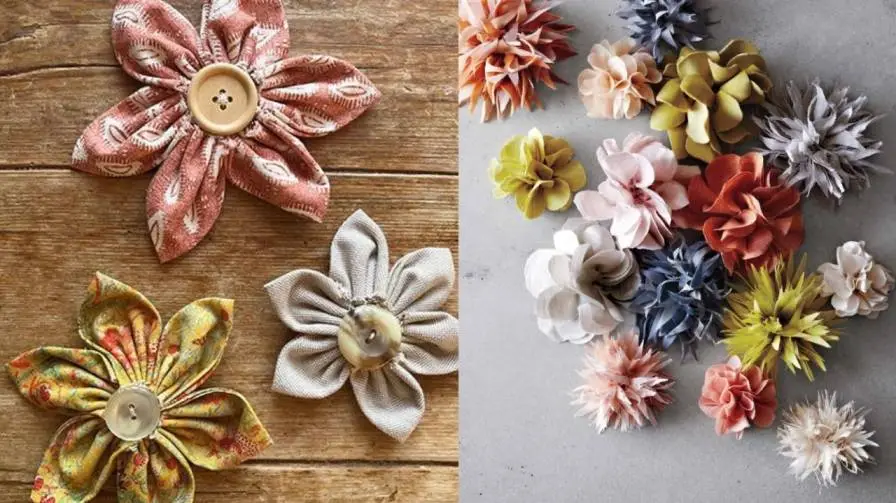
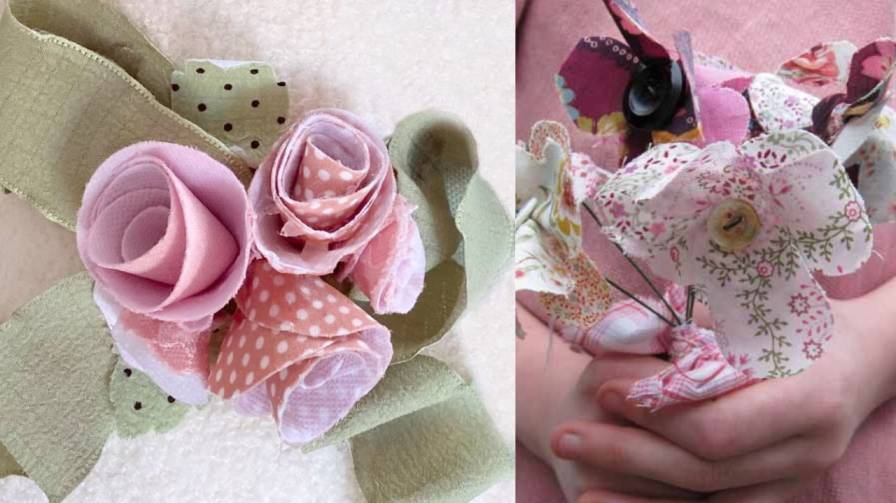
Making fabric flowers for clothes is one of those projects that looks harder than it actually is. You do not need a sewing machine. You do not need years of experience. You need fabric scraps, a needle, some thread, and about thirty minutes. The flowers you make can turn a plain t-shirt into something people ask about. They can cover a stain on a favorite dress. They can give new life to a jacket you almost gave away.
This guide walks you through two different flowers you can sew by hand. One uses simple circles. The other uses folded fabric. Both are beginner friendly. By the end, you will know how to make flowers that stay attached, hold their shape, and look good enough to wear outside.
What You Need Before You Start?
Gather these supplies before you cut anything. Having everything within reach makes the process smoother.
Fabric. Quilting cotton works best for beginners because it holds its shape without being stiff. You can also use linen, felt, or even fabric from old t-shirts. If you want a lighter, more delicate flower, try chiffon or satin. For sturdy flowers that stand up on their own, use a heavier fabric like denim or canvas.
Needle and thread. A hand sewing needle works fine. Use strong thread, like upholstery thread, so it does not break when you pull the gathers tight. Match your thread color to the fabric if you want the stitches to disappear.
Scissors. Sharp fabric scissors make clean cuts. Dull scissors crush the fabric edges and make the petals look messy.
A circle template. A drinking glass, a jar lid, or a small bowl works as a template. You just need something round to trace around. The size of your template decides the size of your flower. A four-inch circle makes a flower about the size of a plum. A two-inch circle makes a smaller flower for a collar or headband.
A felt square. You will cut a small circle from felt to cover the back of the flower. Felt does not fray, so it makes a clean backing that hides your stitches and gives you something sturdy to sew onto the clothes.
A button or bead. This goes in the center of the flower. A shank button works best because the shank fits into the small hole at the flower center and sits securely.
Hot glue gun (optional). Some people use glue to attach the felt backing or the button. Sewing works just as well. If you use glue, use low temperature. High heat can melt synthetic fabrics.
Read Also: DIY Embroidery On Clothes For Beginners
How to Choose Fabric That Works?
Not every fabric behaves the same way when you fold and gather it. Understanding a few basic differences saves you frustration.
Thickness matters. Thin, sheer fabrics like chiffon make light, airy flowers. But they need more layers to stand up. If you use chiffon, you might need ten or twelve circles instead of six. Thicker fabrics like cotton or felt need fewer layers because each fold holds its shape.
Fraying matters. Some fabrics unravel at the edges when you cut them. Chiffon and loosely woven fabrics fray more. Tightly woven cotton and felt fray very little. If you use a fabric that frays, you can either burn the edges lightly with a candle or choose a flower style that hides the raw edges inside the folds. Burning works well for synthetic fabrics but do not do it with cotton or linen. They catch fire instead of melting.
Color and pattern matter. Solid colors show the shape of the flower clearly. Small prints add visual interest without overwhelming the flower. You can also mix two fabrics in one flower for a layered look.
If you are not sure what fabric to use, start with quilting cotton. It is forgiving, easy to find, and holds a fold nicely.
Method One: The Circle Petal Flower
This is the easiest flower to make. It uses flat circles that you fold and gather into petals. You can finish it in about twenty minutes.
Step 1: Cut Your Circles
Decide how big you want your flower. For a flower that works on a shirt or bag, start with a circle about four inches across. Trace around your template six times on the back of your fabric. Cut all six circles.
You can cut them freehand if you are careful, but tracing gives you even petals that look intentional.
Step 2: Fold Each Circle into a Petal
Take one circle. Fold it in half with the wrong sides together. Press the fold with your fingers or an iron. Then fold it in half again. You now have a quarter circle that looks like a small triangle with a curved edge.
Press this fold too. The sharper the creases, the better the petal will hold its shape.
Step 3: Sew Along the Curved Edge
Thread your needle with a double strand of thread and knot the end. Starting at one corner of the curved edge, sew a simple running stitch along the curve to the other corner. Do not cut the thread yet.
Pull the thread gently. The curved edge gathers together and the folded piece cups into a petal shape. Do not pull so hard that the fabric bunches into a knot. You want a smooth curve.
Step 4: Make Five More Petals
Slide the gathered petal down the thread and leave it there. Sew the next folded circle the same way. Keep adding petals until all six are on the thread.
Now pull the thread tight. The petals close into a circle. The first petal and the last petal should meet. Sew them together with a few stitches to close the ring. Knot your thread and cut it.
Step 5: Add the Backing and Center
Cut a small circle from felt, about one inch across. Place it on the back of the flower over the spot where all the petals meet. Sew the felt to the flower with a few stitches around the edge. This covers the raw edges and gives you a flat surface to work with.
Turn the flower over. Sew a button or bead into the center. Push your needle through the button, through the flower, and through the felt. Go back and forth a few times to make it secure. Knot the thread on the back side.
Step 6: Attach the Flower to Your Clothes
You have three options. You can sew the flower directly onto the garment with small stitches around the felt backing. You can sew a safety pin to the felt and pin the flower on, so you can move it between outfits. Or you can sew a hair clip to the felt for a removable accessory that also works on clothes.
Method Two: The Rolled Fabric Flower
This flower looks like a rose. It uses one long strip of fabric that you roll into a spiral. The process feels different from the circle flower, but the result is just as wearable.
Step 1: Cut a Fabric Strip
Cut a rectangle of fabric. For a medium flower, make it about sixteen inches long and three and a half inches wide. If you want a bigger flower, cut a longer strip. If you want a smaller one, cut it shorter.
You can cut the strip straight or on the bias. Bias cut means cutting at an angle to the fabric’s weave. Bias cut strips roll more smoothly and curve more gracefully. But straight strips work fine too, especially with cotton.
Step 2: Fold and Sew the Strip
Fold the strip in half lengthwise with the right sides together. Sew a straight stitch along the long open edge, about a quarter inch from the edge. Do not sew the short ends closed.
Turn the tube right side out. You now have a long, flat fabric tube. Press it flat with an iron.
Step 3: Roll the Center
Take one short end of the tube. Fold the end over about half an inch and roll it tightly into a small coil. This coil becomes the center of the flower. Sew through the bottom of the coil to hold it together.
Step 4: Keep Rolling and Folding
Now comes the part that requires a little patience. As you wrap the fabric tube around the center coil, fold the fabric down every inch or so. The fold creates a petal that overlaps the previous layer. Sew each fold in place with a small stitch at the bottom.
Do not worry about making it perfect. Real roses are not perfect either. If a fold looks wrong, undo the stitch and try again. The stitches go on the underside of the flower, so they will not show when you attach it to fabric flowers for clothes.
Step 5: Finish the Flower
When you reach the end of the fabric strip, fold the raw end under and sew it to the back of the flower. This hides the edge and gives the flower a clean finish.
Fluff the folds with your fingers to open up the petals. The more you fluff, the fuller the flower looks.
Step 6: Attach the Flower
Sew the flower to your clothes with small stitches through the base. Because this flower has more bulk than the circle flower, it works best on heavier fabrics like denim jackets, canvas bags, or wool coats. On thin t-shirts, the weight might pull the fabric down.
You May Also Like: Easy DIY Fabric Flower Brooch Ideas For Sarees
How to Attach Fabric Flowers to Clothes?
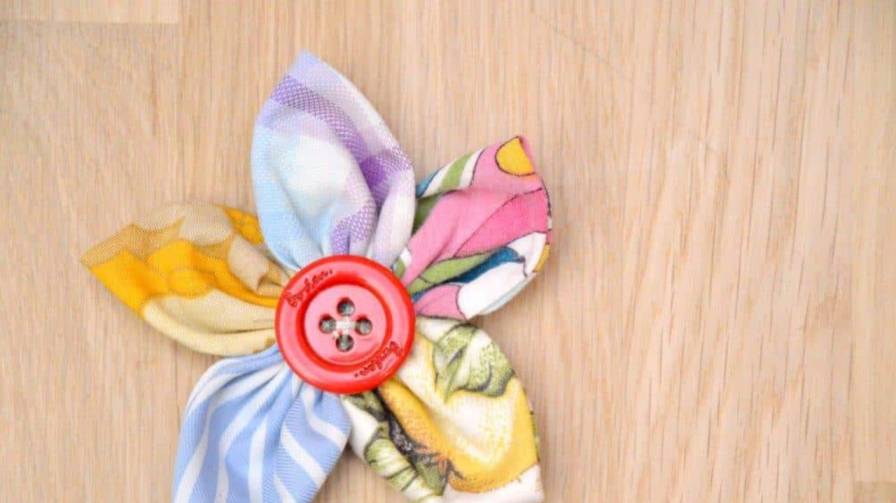
The way you attach the flower matters as much as how you make it. A flower that falls off after one wear is frustrating. Here are the methods that hold up.
Sewing Directly
This is the most secure method. Place the flower where you want it on the garment. Pin it in place. Use a needle and thread to sew small stitches around the felt backing, catching only the surface of the garment. Do not sew through to the front of the shirt.
For knits and stretchy fabrics, use a few stitches that allow the fabric to stretch without tearing. For woven fabrics like denim or cotton, sew all the way around the backing.
Using a Safety Pin
Sew a safety pin to the felt backing of the flower. Then pin the flower wherever you want it on your clothes. This lets you move the flower from one outfit to another. It also means you can wash the garment without the flower. Just remember to remove the pin before washing.
Using a Hair Clip
Sew a small alligator clip or snap clip to the felt backing. This is the same method people use for hair flowers. It works on clothes too. You can clip the flower to a lapel, a collar, or the strap of a bag.
Common Mistakes and How to Avoid Them
Most fabric flower problems come from a few small things. Fixing them makes the difference between a flower that looks handmade and one that looks homemade.
Using dull scissors. Dull scissors crush the fabric edges. The petals look ragged instead of clean. Use sharp fabric scissors and cut with long, smooth strokes.
Skipping the iron. Pressing the folds makes the petals hold their shape. If you skip this step, the flower looks flat and lifeless. Press each fold as you make it.
Pulling the gather thread too hard. When you gather the circle petals, pull gently. If you yank the thread, the fabric bunches up and the petal looks crumpled. If this happens, loosen the thread and smooth the fabric with your fingers.
Using high heat on synthetic fabric. Hot glue and high heat from an iron can melt polyester, satin, and chiffon. Use low-temperature glue and a low iron setting.
Not testing the fabric first. Before you commit to a fabric, cut a small piece and fold it. See how it behaves. Test how it frays. Test how it holds a crease. Five minutes of testing saves an hour of frustration.
How to Care for Fabric Flowers on Clothes?
Fabric flowers are durable, but they need a little care to stay looking good.
If you sewed the flower directly onto the garment, wash the garment inside out on a gentle cycle. Or hand wash it. Do not put it in the dryer. The heat can shrink the fabric or loosen the glue.
If you used a pin or clip, remove the flower before washing.
To clean the flower itself, dust it with a soft brush or use a hair dryer on the cool setting. For heavier dirt, spot clean with a damp cloth and let it air dry completely. Do not soak it in water, especially if you used glue.
Store extra flowers in a dry container. If you live in a humid place, add a small packet of silica gel to absorb moisture.
Why Fabric Flowers Are Worth Making?
Store-bought embellishments cost money and look like everyone else’s. Fabric flowers made by hand cost almost nothing. They use scraps you already have. They let you match the exact color and fabric of a garment. They turn a plain piece of clothing into something personal.
The first flower you make might look uneven. That is fine. The second one will look better. By the third, you will have your own rhythm. You will know how tight to pull the thread. You will know which fabrics you like working with. You will start seeing flowers in every scrap of fabric you own.
Other Articles
Upcycled Coffee Mug with Cricut Joy