I have been painting on wood for about six years now. Started with a small sign for my kitchen. Made a mess of it honestly. But I learned. And now I want to share what I know. This is not complicated stuff. Anyone can do it. Really. You just need to know a few basic things. And I mean basic acrylic paint on wood crafts.
Let me walk you through it.
Why I Like Acrylic For Wood?
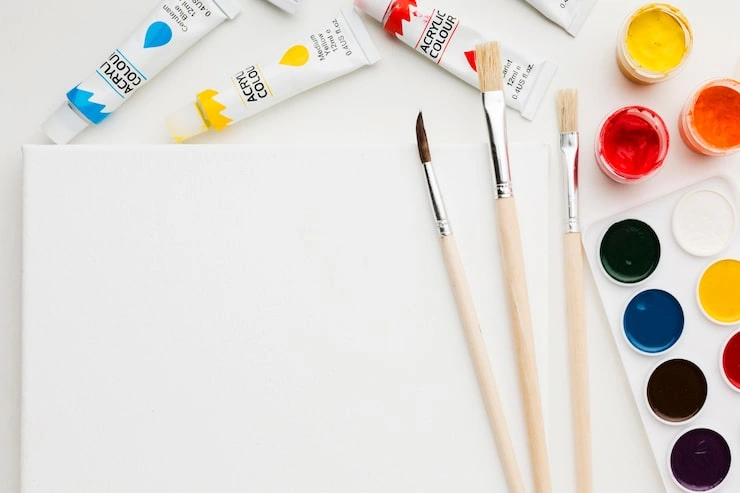
I have tried other paints. Oil paint takes forever to dry. Like days. Who has time for that? Chalk paint is nice but expensive. Acrylic is cheap. And it works. You can get a bottle for a few bucks. Maybe less if you catch a sale. It cleans up with water. No special chemicals. No smell that makes your head hurt.
My kids paint with it. They are six and eight. If they can use it, you can too. The best part? It dries fast. Really fast. Like an hour fast. Sometimes less if you put it on thin. This means you can finish a project in one afternoon. Start at breakfast. Hang it on the wall by dinner.
Picking Wood
Okay so here is the thing about wood. Not all wood is the same. I learned this the hard way. First project I did was on a piece of scrap wood from my garage. No idea what kind it was. Probably pine. The paint soaked right in. I put on coat after coat. Still looked blotchy. I was so annoyed.
Now I know better.
Pine And Cedar
These are soft woods. Light color. Easy to find. Cheap too. But they drink paint like a sponge. You need more coats. And you definitely need primer. More on that later. I use pine for signs and simple wall hangings. Things that do not need to be perfect.
Oak And Maple
Hard woods. Smooth surface. Paint sits on top. Looks bright and crisp. These cost more though. I save these for gifts or things I want to keep forever. My favorite is birch. Smooth as glass almost. Paint glides right on.
Plywood
This is what I use most. It is cheap. Flat. Easy to cut. You can buy a big sheet for like twenty bucks. Make ten projects from it. One warning though. The edges are rough. They soak up paint like crazy. You have to seal them first. I use wood filler on the edges. Then sand. Then prime. Extra work but worth it.
Prep Work
This is the part nobody wants to do. But I promise you. I promise. If you skip this, your paint will peel. It will chip. It will look terrible. And you will be sad.
Do the prep.
Sanding
You need sandpaper. Start with medium grit. Around 120. Rub the wood. Go with the grain. Not against it. Against it leaves scratches. Then switch to fine grit. 220 or so. Make it smooth. Really smooth. Like baby skin smooth. Wipe off the dust. Use a tack cloth if you have one. Or just a damp rag. Let it dry. My first few projects I did not sand enough. The paint looked rough. Bumpy. I thought it was the paint. Nope. It was me being lazy.
Priming
Primer is your friend. Use it. Primer does two things. It seals the wood so paint does not soak in. And it gives you a white base so your colors pop. Skip primer and your red looks pink. Your blue looks gray. Your yellow looks muddy. Not good. I use a spray primer sometimes. Fast and easy. But brush-on primer works too. Just put it on thin. Let it dry. Sand lightly. Then you are ready.
Painting
Now the fun part. Finally.
Brushing
- Get a good brush. Not the cheap ones that leave hairs in your paint. Spend a few extra dollars. Worth it.
- Dip the brush in paint. Tap off the extra. Do not load it up. Thin coats are better.
- Brush in one direction. Long smooth strokes. Do not go back and forth. That leaves marks.
- Let it dry. Then do another coat. Maybe three if you want it really solid.
- My wife always rushes this part. She wants to do one thick coat. Then she gets drips. Then she gets mad. Then I have to fix it. Do not be like my wife. Do thin coats.
Sponging
- This is fun. Get a sponge. Wet it. Squeeze it out. Dip in paint. Dab it on the wood.
- Gives a cool textured look. Like clouds or leaves. Or a rustic farmhouse thing. Very popular right now.
- I made a sign for my sister with this technique. She loved it. Asked me to make another.
Dry Brushing
- This gives an antique look. Dip brush in paint. Wipe most of it off on a paper towel. Almost dry. Then lightly brush over the wood.
- The paint catches on the raised parts of the grain. Looks old and worn. Nice for vintage style projects.
Mistakes I Have Made
Oh man. Where do I start.
Peeling
- This happened on my second project. Painted a wooden box for my mom. Looked great. Two days later the paint started peeling. Like sunburn.
- Why? I did not prime it. And I did not clean the wood. There was oil from my hands.
- Fix? Scrape it off. Sand it down. Prime it. Repaint. Learn from my mistake.
Brush Marks
- Hate these. Looks like you painted with a broom.
- Caused by thick paint or bad brush. Or both.
- Fix by thinning the paint. Just a few drops of water. And use a soft brush. Sand between coats too.
Bubbles
- Little bubbles in the paint. Why? Because I shook the jar. Shaking traps air. Stir instead. Slowly.
- If bubbles happen, let it dry. Sand lightly. Paint again.
Dull Colors
- Painted a bright yellow sunflower on dark wood. Looked like a dirty dishrag.
- Should have used primer. White primer makes colors bright. Lesson learned.
Sealing
- Do not skip this. Please.
- Sealer protects your work. Scratches. Water. Sun. All bad for paint. Sealer stops them.
Water-Based Sealer
This is what I use most. Goes on clear. Does not yellow. Cleans up with water. No smell. Good for indoor stuff.
Oil-Based Sealer
Stronger. Better for outdoors. But stinks. Like really stinks. And you need mineral spirits to clean brushes. I avoid it unless I have to.
Wax
Easy to apply. Just rub it on with a cloth. Gives a soft finish. Not as protective though. I use wax on decorative stuff that just sits there. Apply thin coats. Two coats minimum. Sand lightly between coats with very fine paper. Let it cure. Curing takes longer than drying. Read the acrylic paint on wood crafts.
Project Ideas
Here are some things I have made.
Signs
Cut a board. Sand it. Prime it. Paint the whole thing one color. Let dry. Paint words or designs on top.
I made a sign for my front door. Says "Welcome." Simple. Looks good.
Trays
Plain wooden tray from the craft store. Painted a design on the bottom. Flowers. Stripes. Whatever. Sealed it. Use it for keys and mail.
Coasters
Small squares of wood. Sand the edges smooth. Paint each one a different color. Seal with multiple coats. Give as gifts. People love handmade coasters.
Ornaments
Cut wood into shapes. Drill a small hole. Paint. Add ribbon. Hang on tree. My kids make these every year.
Furniture
I painted an old dresser once. Sanded it. Primed it. Painted it light blue. Sealed it. Looks brand new. My wife was impressed. That does not happen often.
Taking Care Of Your Crafts
- Dust with soft cloth. Do not use wet rags. If you must clean a spot, use slightly damp cloth. Wipe dry right away.
- Outdoor stuff bring inside during bad weather. Rain and sun wear down sealer. Check sealer once a year. Reapply if needed.
- Never put painted wood in dishwasher. Never in microwave. Obvious right? You would be surprised.
Final Thoughts
Look. This is not hard. It really is not. Sand. Prime. Paint thin coats. Seal. That is it. You will make mistakes. I still do. Every project teaches you something. Start simple. A small sign. A couple of coasters. Get comfortable. Then try bigger things. The joy of making something with your hands. There is nothing like it. Seeing your work on the wall. Giving a gift you made yourself. That feels good.
So grab some wood. Grab some paint. Start today. You will be glad you did. And if you mess up? So what. Sand it down and start over. No big deal.

Thrift Flip Ideas For Beginners
Upcycled Coffee Mug with Cricut Joy