Every teacher knows the feeling. It is Friday afternoon. You have forty minutes left. You look at your desk. There is a pile of empty plastic bottles. There is a stack of old newspapers. The parents sent in toilet paper rolls. You have no budget for art supplies. But you still need a good project for Monday morning.
This is where recycled craft ideas come to life. You do not need fancy materials. You do not need a big budget. You just need a few common things from home. And you need a plan that works for children.
This guide gives you that plan. I will show you the best recycled craft ideas for school projects. I will tell you exactly what to do. I will tell you what age works best for each project. And I will tell you how to keep the mess under control.
Why Recycled Crafts Matter In School?
Children learn better when they use their hands. This is a fact. When a child cuts, glues, and builds something, their brain works harder. They remember what they made. They feel proud of their work.
Recycled crafts also teach children about waste. They see that a plastic bottle does not have to go to the trash. It can become a flower pot. It can become a bird feeder. It can become a pencil holder. This lesson stays with them for years.
Teachers also save money. School budgets are tight. Art supplies cost more every year. When you use recycled materials, you spend less. You can do more projects. The children get more creative time.
Parents like recycled crafts too. They have these things at home. They do not need to drive to the store. They do not need to buy expensive kits. They can help their children with simple materials they already have.
Read Also: Craft Ideas For 14 Inch Raw Wood Plates
What You Need Before You Start?
Before you begin any project, gather your basic tools. Keep these in a box in your classroom. This saves time. You do not want to search for scissors when the children are waiting.
You will need good scissors. Children need scissors that fit their hands. Small scissors work best for small hands. Keep a few pairs of adult scissors for yourself. You will use them to cut thick cardboard.
You will need glue. White school glue works for paper and cardboard. Glue sticks are good for small pieces. A hot glue gun is useful for bigger projects. But only the teacher should use the hot glue gun. It gets very hot. Children can burn themselves.
You will need paint. Tempera paint works well on recycled materials. It dries fast. It washes off hands and clothes. Acrylic paint is better for projects that go outside. It does not wash off in the rain.
You will need markers and crayons. Children like to decorate their projects. They like to add faces and colors. Let them use their imagination. Do not worry if it looks messy. That is part of the fun.
You will also need a place to dry projects. Put newspaper on a table. Put finished projects there. Let them sit overnight. This keeps your classroom clean.
Plastic Bottle Crafts For School
Plastic bottles are everywhere. Children bring them in their lunch boxes. Parents throw them away at home. But these bottles are perfect for school projects. They are light. They are easy to cut. They hold paint well.
Bottle Flower Pots
This is one of the best recycled craft ideas for school projects. It is simple. It works for young children. And they can take it home to show their parents.
Take a plastic bottle. Cut the top part off. You need the bottom part. That becomes your pot. Let the children paint the outside. They can use bright colors. They can add dots or stripes. They can draw flowers on the pot.
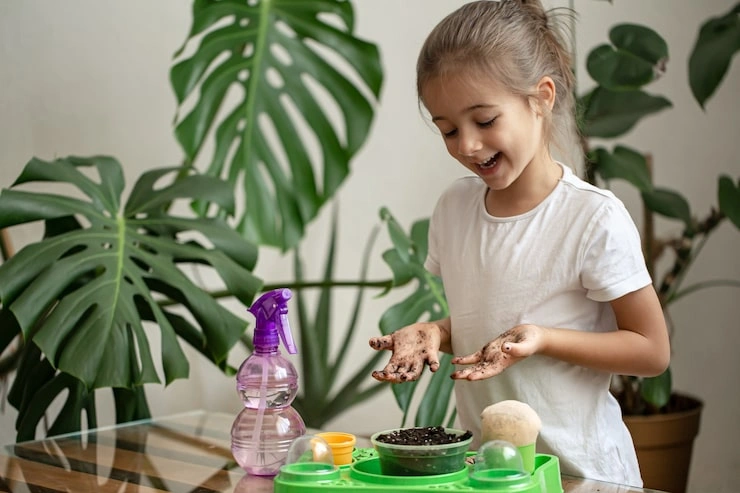
Put a small plant inside. You can use a cutting from a houseplant. Or you can put seeds in soil. The children water their pot every day. They watch the plant grow. This teaches them about nature. It also teaches them to care for living things.
This project works best for children aged five to eight. They can paint easily. They can handle the soil. They need help with cutting. The teacher should cut all the bottles before class.
Bottle Bird Feeders
Older children like this project. It takes more work. But the result is wonderful. You can hang the bird feeders outside the classroom window.
Take a large plastic bottle. Make a small hole near the bottom. Put a wooden spoon through the hole. The spoon sticks out. This is where the birds sit. Make two more holes above the spoon. Put a stick through these holes. This is where the birds hold on.
Cut a small opening above the spoon. This is where the bird food comes out. Fill the bottle with bird seeds. Put a string around the neck of the bottle. Hang it from a tree or a hook.
The children watch the birds come. They learn about different birds. They learn what birds like to eat. They learn to be quiet so they do not scare the birds away.
This project works best for children aged eight to twelve. They can use scissors safely. They can measure the holes. They need help with the string. The teacher should tie the knots.
Bottle Pencil Holders
Every child needs a pencil holder on their desk. This project makes one from a bottle. It is quick. It is useful. The children use it every day.
Cut the top of a plastic bottle. Keep the bottom part. Let the children decorate it. They can wrap it in colorful paper. They can paint it. They can put stickers on it.
Let the holder dry. Then put pencils, pens, and markers inside. The child can keep it on their desk at home. It reminds them of what they made. It also keeps their workspace tidy.
This project works for all ages. Young children can paint. Older children can use more complex decorations. You can do this project in one class period.
Toilet Paper Roll Crafts
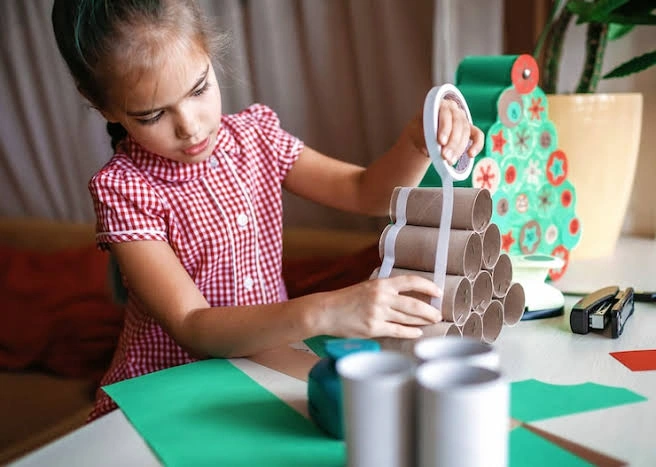
Toilet paper rolls are the most common recycled material. Every home has them. Every school gets them. They are easy to store. They are easy to cut. They are perfect for small hands.
Roll Animals
This is a classic school craft. Children love making animals. They can make anything they want. A dog. A cat. A rabbit. A bird. Their imagination is the only limit.
Take one toilet paper roll. This is the animal body. Let the child choose an animal. Then they add features. They can cut ears from paper. They can glue on googly eyes. They can draw a face with markers.
They can also paint the whole roll. A brown roll becomes a bear. A gray roll becomes an elephant. A white roll becomes a polar bear. The colors make the animal real.
For older children, make the project more complex. They can cut the roll to make legs. They can add tails from pipe cleaners. They can make a whole zoo of animals. Each child can make a different animal. Then you have a classroom zoo.
This project works for children aged four to ten. Young children need help with cutting. Older children can do everything themselves.
Roll Binoculars
This project is fun for younger children. They pretend to be explorers. They look out the window. They look at the playground. They feel like scientists.
Take two toilet paper rolls. Glue them together side by side. This makes the binoculars. Let the child paint them. They can make them any color. They can add decorations.
Put a string between the two rolls. This goes around the child neck. They can wear their binoculars all day. They can look at things outside. They can look at things in the classroom.
This project is very simple. It takes only twenty minutes. It works best for children aged three to six. They love to pretend. They love to wear things around their neck.
Roll Seed Starters
This project is good for spring. You start seeds in the classroom. You watch them grow. Then you plant them in the garden.
Take toilet paper rolls. Cut four small slits at the bottom. Fold these slits inward. This makes a bottom for the roll. The soil stays inside.
Fill the roll with soil. Put one seed in each roll. Water the seed lightly. Place all the rolls in a tray. Put the tray near a window. The seeds grow inside the roll.
When the plant is big enough, you plant the whole roll. The cardboard breaks down in the ground. The plant keeps growing. This is a great lesson about nature. Children see the whole life cycle.
This project works for children aged six to twelve. They can fill the rolls with soil. They can water the seeds. They need help with the slits. The teacher can cut them before class.
Newspaper And Magazine Crafts
Newspapers and magazines pile up. They are easy to find. They are free. They are light. They are perfect for school art.
Paper Mache Bowls
This is a messy project. But it is worth it. Children love the feeling of paper mache. They love the result. They make a bowl they can use.
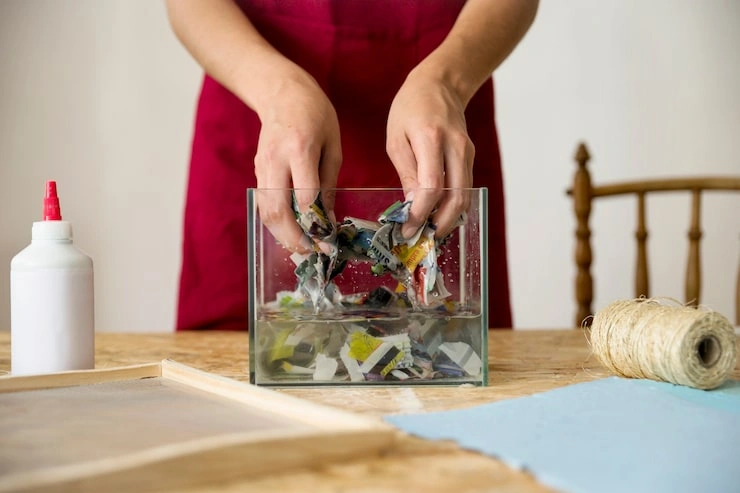
Take a balloon. Blow it up to the size you want. Tear newspaper into small strips. Make a glue mixture. Mix one part white glue with one part water. Dip the strips in the glue. Place them on the balloon. Cover the whole balloon.
Let it dry for one day. Pop the balloon. You are left with a hard bowl. The children can paint the bowl. They can decorate it. They can use it to hold small items.
This project takes two days. Day one is making the bowl. Day two is painting. It works best for children aged eight and older. Younger children get too messy. They also do not have the patience.
Magazine Collages
Collages are simple. They are quick. They work for any age. Children cut out pictures. They glue them on paper. They make a new picture.
Give each child a magazine. Give them scissors and glue. Tell them to find pictures of a theme. It can be animals. It can be food. It can be places. They cut out the pictures. They arrange them on paper. They glue them down.
They can also make abstract collages. They cut out colors and shapes. They arrange them in a pattern. This teaches them about design. It teaches them about colors.
This project works for all ages. Young children cut simple shapes. Older children make complex scenes. You can do this project in one class period. Clean up is quick.
Newspaper Hats
This is a classic. Children make hats from newspaper. They wear them. They show them off. They take them home.
Take a large sheet of newspaper. Fold it in half. Fold the corners down. Fold the bottom edges up. You have a simple paper hat. Children can decorate the hat. They can color it. They can add stickers. They can add feathers.
This project is very fast. It takes ten minutes. It works for all ages. Young children need help with the folding. Older children can follow the steps by themselves.
Cardboard Box Crafts
Big cardboard boxes are a treasure. They come from packages. They come from appliances. They are big. They are strong. They become many things.
Cardboard Houses
This project takes time. But children love it. They build a house. They can sit inside it. They can play inside it.
Take a large cardboard box. Cut a door on one side. Cut a window on another side. Let the children paint the outside. They can make it look like a real house. They can add a roof. They can add a chimney.
Let the children decorate the inside too. They can put paper on the walls. They can make furniture from small boxes. They can make a bed. They can make a table.
This project takes a few days. It works best for children aged six to ten. They can work in groups. Each group makes one house. They learn to work together. They learn to share.
Cardboard Cars
Children love cars. They love to sit in them. They love to pretend to drive. A cardboard car is easy to make.
Take a medium box. Cut a hole for the child to sit. Cut a steering wheel from another piece of cardboard. Attach it to the front. Cut circles for wheels. Attach them to the sides.
The children paint the car. They make it their favorite color. They add a number to the front. They add headlights. They add a license plate.
This project works for children aged four to eight. They can paint and decorate. They need help with the cutting. The teacher should do all the cutting before class.
You May Also Like: Top 10 Creative Wood Burning Crafts for Beginners
Glass Jar Crafts
Glass jars are useful. They come from pasta sauce. They come from pickles. They come from jam. They are strong. They are clear. They look beautiful when decorated.
Jar Lanterns
This project makes a beautiful lantern. You can hang it outside. You can put it on a table. It gives a soft glow.
Take a clean glass jar. Clean off the label completely. Let the child paint the outside. They can use glass paint. They can use tissue paper and glue. They make a pattern. They make a picture.
Put a small candle inside. Use a battery-operated candle. Real candles are too dangerous. The light shines through the paint. It looks beautiful. The children are proud of their work.
This project works for children aged eight and older. They can handle the glass safely. They need help with the tissue paper. The teacher should show them how.
Jar Coin Banks
Children need a place to save their money. This project gives them one. It is useful. It is personal. It is easy to make.
Take a clean glass jar. Cut a small slit in the lid. This is where the coins go. Let the child decorate the jar. They can paint it. They can wrap it in paper. They can put their name on it.
They put their coins through the slit. They save their money. They can open the jar when it is full. They can count their money. This teaches them about saving.
This project works for all ages. Young children can decorate the jar. Older children can make more complex designs. It is a quick project. It takes thirty minutes.
Tin Can Crafts
Tin cans are strong. They hold weight. They last a long time. But they have sharp edges. You must be careful with them.
Can Pencil Holders
This is a classic tin can craft. It is useful. It is simple. It is safe if you prepare the cans correctly.
Take a clean tin can. Make sure there are no sharp edges. You can use a can opener that leaves a smooth edge. You can also sand the edge down. Let the child decorate the can. They can wrap it in fabric. They can wrap it in paper. They can paint it.
Put pencils and pens inside. The child keeps it on their desk. This project works for children aged eight and older. They can handle the can safely. They understand not to touch the sharp edges.
Can Wind Chimes
This project makes a beautiful sound. You hang the cans outside. The wind hits them. They make music.
Take several small tin cans. Clean them well. Paint them different colors. Make a small hole in the bottom of each can. Put a string through the hole. Tie a knot. Attach all the strings to a stick. Hang the stick outside.
When the wind blows, the cans hit each other. They make a gentle clinking sound. It is nice to hear. The children learn about sound. They learn about the wind.
This project works for children aged ten and older. They can make the holes. They can paint the cans. They need help with the knots. The teacher should tie them.
Tips For Teachers
You have many children. You have limited time. You have limited space. Here are some tips to help you.
Prepare Materials Before Class
Do not cut things during class. The children will get bored. They will make noise. Cut all bottles before class. Cut all cardboard before class. Clean all jars before class. Have everything ready.
Set Up Work Stations
Do not let children wander around. This creates chaos. Set up stations. One station for painting. One station for gluing. One station for decorating. Children rotate through the stations. This keeps the classroom organized.
Have A Drying Area
Projects need to dry. Put newspaper on a table. Put finished projects there. Do not let children touch them. Let them sit until the next day. This prevents smudges. This prevents broken projects.
Expect Mess
Recycled crafts are messy. Children spill glue. Children drip paint. This is normal. Accept it. Put newspaper on all tables. Have wet wipes ready. Have paper towels ready. Clean up at the end.
Let Children Be Creative
Do not control everything. Let children make choices. Let them choose colors. Let them choose decorations. Let them make mistakes. This is how they learn. The project does not have to look perfect. It is their work. That is what matters.
How To Manage Different Age Groups?
Not every project works for every age. Young children have different skills. Older children need more challenge. Here is how to pick the right project.
Ages Three To Five
Young children can paint. They can glue. They can decorate. They cannot cut well. They cannot measure. They cannot handle sharp objects.
Choose simple projects. Pencil holders. Collages. Paper hats. Roll binoculars. Let them paint freely. Do not worry about the result. It is about the process.
Ages Six To Eight
Children at this age can cut. They can follow steps. They can work on a project for a longer time. They start to care about the result.
Choose medium projects. Bottle flower pots. Roll animals. Cardboard cars. Let them do more themselves. Let them cut with help. Let them make decisions.
Ages Nine To Twelve
Older children can handle more. They can use hot glue guns with supervision. They can measure. They can plan. They can work on multi-day projects.
Choose complex projects. Bird feeders. Paper mache bowls. Tin can wind chimes. Let them work in groups. Let them present their work to the class.
Read: Wood Hearts For Crafts: What You Need To Know
How To Display The Finished Projects?
Children want to see their work displayed. It makes them proud. It makes them feel valued. Here are ways to show off their crafts.
Classroom Display Wall
Put up a bulletin board. Pin the flat projects on it. Collages. Paper hats. Drawings. Make a big sign that says "Recycled Art." Change the display every month.
Hanging Displays
Hang projects from the ceiling. Use string. Use paper clips. Hang bird feeders. Hang wind chimes. Hang lanterns. This uses empty space. It looks beautiful.
Hallway Display
Ask the principal for hallway space. Put projects in the hallway. All the school sees them. Parents see them during visits. Children feel like real artists.
Take Home
Send projects home. Parents love to see what their child made. They put them on the refrigerator. They show them to grandparents. This builds a connection between school and home.
Common Problems And Solutions
Things go wrong. This is part of teaching. Here are common problems and how to fix them.
Glue Does Not Hold
This is common. Some glue does not stick to plastic. Use stronger glue. Use a hot glue gun for big pieces. Use craft glue for plastic. Test the glue before class.
Paint Peels Off
Some paint does not stick to smooth surfaces. Plastic bottles need special paint. Use acrylic paint. It sticks better. It does not peel. You can also sand the bottle first. This makes the surface rough. Paint sticks better.
Projects Fall Apart
Children are rough with their projects. They carry them in their bags. They drop them. Make projects strong. Use enough glue. Use tape for extra strength. Let projects dry completely before children take them home.
Children Finish Early
Some children work fast. They finish early. They get bored. They disturb others. Have extra activities ready. Let them make a second project. Let them help others. Let them clean the art area.
Frequently Asked Questions
What is the best glue for recycled crafts?
White school glue works for paper and cardboard. Craft glue works for plastic. A hot glue gun works for heavy pieces. Always test a small spot before gluing the whole project.
How do you store recycled materials in the classroom?
Use big boxes. Label each box. One box for bottles. One box for rolls. One box for cardboard. One box for jars. Keep the boxes in a closet. Take them out when you need them. Ask parents to bring materials from home.
How do you clean glass jars for crafts?
Soak the jar in hot water. The label comes off easily. Rub off the leftover glue with a sponge. Wash the jar with soap. Dry it completely before decorating. Make sure there is no sharp edge on the rim.
What age is best for recycled crafts?
All ages can do recycled crafts. Young children paint and glue. Older children cut and build. Pick the project for the age. Keep safety in mind. Always supervise children.
Can recycled crafts be done outside?
Yes, some projects work better outside. Bird feeders go outside. Wind chimes go outside. Painting can be done outside. It keeps the mess out of the classroom. Just pick a day with good weather.
A Final Word
Recycled crafts are more than just art. They are a lesson about our world. They teach children to see value in things we throw away. They teach children to create. They teach children to think.
You do not need a big budget. You do not need fancy supplies. You need imagination. You need patience. You need a little time.
Start with one project. Try the bottle flower pots. They are easy. They work for many ages. See how the children react. See how they smile when they finish. That smile is why we teach.
Then try another project. Try the roll animals. Try the paper hats. Try the collages. Build a routine. Make recycled crafts part of your classroom. Your children will learn. Your children will grow. Your children will remember these projects for years.
The best recycled craft ideas for school projects are the ones that children enjoy. The ones they make with their hands. The ones they take home to show their parents. The ones that teach them something new.

Castor Oil Beauty Hacks For Eyebrows
Upcycled Coffee Mug with Cricut Joy