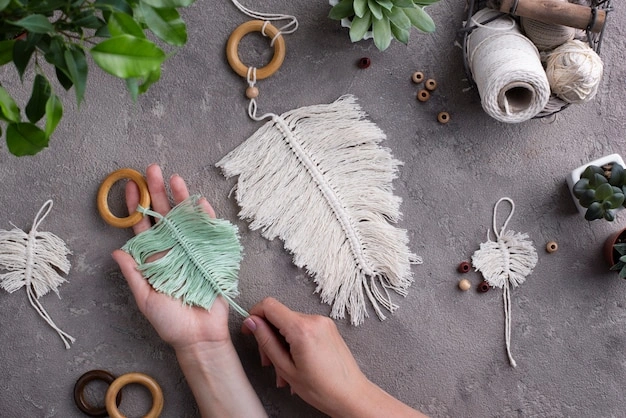
Macrame is making a big comeback. Many people want to learn this craft. But buying special macrame cord can cost a lot of money. There is a better way. You can use fabric strips instead. This guide will show you everything you need to know.
What Is Macrame With Fabric Strips?
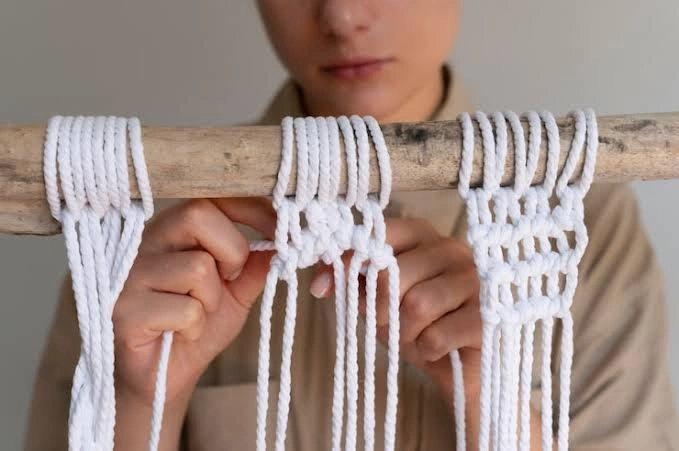
Macrame is the art of tying knots to make things. People have done this for hundreds of years. Sailors made rope knots. They turned these knots into useful items. Now we make wall hangings, plant holders, and bags.
Using fabric strips is a new twist on this old craft. Instead of buying cord from a store, you cut old clothes or sheets into long strips. These strips become your material. You tie them just like regular macrame cord. The result looks different. It feels softer. It has a unique look that store-bought cord cannot copy.
Why Choose Fabric Strips?
There are many good reasons to use easy macrame with fabric strips.
Save Money
Macrame cord is not cheap. A small roll can cost fifteen dollars or more. A big project needs several rolls. The cost adds up quickly. Fabric strips cost nothing if you use old clothes. You probably have items in your closet that you do not wear anymore. Those items become your craft supplies.
Help The Earth
Every year, people throw away millions of pounds of clothing. Most of it ends up in landfills. Fabric takes a long time to break down. When you use old fabric for macrame, you keep it out of the trash. You give it a new life. This is a small way to help the planet.
Soft Texture
Fabric strips feel nice in your hands. They are not stiff like rope. The finished project has a cozy, soft look. This works well for things you touch often. A wall hanging made from fabric strips adds warmth to a room. A plant holder with soft fabric looks inviting.
Easy To Find
You do not need to go to a craft store. Look in your own home. Old t-shirts work great. Bed sheets that have stains can become art. Towels that are too worn can find new purpose. You likely have everything you need right now.
No Special Tools
Macrame with fabric strips does not require expensive tools. You need scissors. You need a measuring tape. You need something to hang your work from. That could be a dowel, a stick from your yard, or even a metal ring. Most people have these things at home.
Read Also: Easy Patchwork Clothing Ideas
Materials You Will Need
Before you start cutting, gather your supplies. This makes the process smooth and enjoyable.
Fabric
Cotton fabric works best. T-shirts are perfect. The stretchy material is easy to cut. It does not fray much. Old sheets are another good choice. Look for cotton sheets. Jersey knit is ideal. This is the same material used for t-shirts.
Avoid heavy fabric like denim. It is too thick and hard to tie. Avoid slippery fabric like silk. The knots will not stay tight. Avoid fabric that frays a lot. Linen can be tricky for beginners. Stick with cotton for your first projects.
Scissors
You need sharp scissors. Fabric scissors work best. Dull scissors make cutting difficult. The strips will not be even. This affects your final project. If you do not have fabric scissors, use the sharpest ones you have.
Measuring Tape
A measuring tape helps you cut even strips. You can also use a ruler. Some people use a yardstick. The important thing is to measure your strips. Equal widths make neat knots.
Dowel Or Stick
You need a base to attach your fabric strips. A wooden dowel from a craft store works. A stick from your yard works too. You can also use a metal ring. The base holds your work while you tie knots.
Something To Hang Your Work
You need to hang your base while you work. A hook on the wall is good. You can also use a coat rack. Some people put a hook on the back of a door. The hook should be at eye level. This makes it comfortable to tie your knots.
How To Prepare Your Fabric?
Taking time to prepare your fabric makes the rest of the project easier. Rushing this step leads to problems later.
Cutting Strips
Decide how wide you want your strips. For beginners, one inch is a good width. This is easy to work with. The knots will show up clearly. You can try half-inch strips later. Narrower strips are harder to handle.
Cut your fabric into strips. Cut from one edge to the other. Go straight across. Try to keep all strips the same width. This creates a neat finished project.
How Long Should Strips Be
The length matters a lot. A common rule is to cut strips four times longer than your finished project. If you want a final piece that is twelve inches long, cut your strips forty-eight inches long. This gives you enough material for knotting.
Connecting Strips
One strip may not be long enough. You need to connect strips together. There is a simple way to do this. Take two strips and overlap their ends. Cut a small slit in each end. Put one slit through the other. Pull tight. This creates a flat connection. It is almost invisible in your finished work.
Basic Knots For Beginners
You do not need to know many knots to start. Three knots will let you make many projects. Learn these and you can create beautiful pieces.
The Lark's Head Knot
This knot attaches your fabric to your base. It is the first knot you need to learn.
Take a fabric strip. Fold it in half. This creates a loop at the top. Place the loop over your dowel. Pull the two loose ends through the loop. Pull tight. You have attached your first piece. Repeat this for all your fabric strips.
The Square Knot
This is the most used knot in macrame. It is the foundation of many patterns.
You need four strips to make one square knot. Take the two strips on the left. Cross them over the two strips in the middle. Take the two strips on the right. Cross them under the middle strips. Bring them up through the loop on the left. Pull tight. This is the first half.
Now do the opposite. Take the two strips on the left. Cross them under the middle strips. Take the two strips on the right. Cross them over the middle strips. Bring them down through the loop on the right. Pull tight. This completes the square knot.
Practice this knot until it feels natural. Your fingers will learn the movement.
The Half Knot
This is simpler than the square knot. It is only one part of the square knot.
Take four strips. Cross the two left strips over the middle. Pass the two right strips under the middle. Bring them through the left loop. Pull tight. That is the half knot.
You can make a spiral pattern by repeating half knots. The spiral twists as you go. This looks beautiful and is very simple.
Step By Step Wall Hanging Project
Now you will make your first project. Follow these steps carefully. Take your time. There is no rush.
Step One: Choose Your Base
Find a wooden dowel or a stick. Clean it if you found it outside. Make sure it is smooth. Rough wood can snag your fabric.
Your dowel should be longer than you want your final project. If you want your wall hanging to be twelve inches wide, use a dowel that is fifteen inches long. The extra space gives you room to hang it.
Step Two: Cut Your Strips
Decide how many strips you need. For a twelve-inch wide hanging, you might use twelve strips. Each strip should be four times your desired length.
If you want the hanging to be twenty-four inches long, cut your strips ninety-six inches long. This seems like a lot. Remember that knotting uses up length. The finished piece will be shorter.
Step Three: Attach The Strips
Use the Lark's Head knot to attach each strip to your dowel. Slide the strips next to each other. Do not leave big gaps. The strips should sit snugly together.
Push each strip to the side as you go. This keeps your work organized. You want an even distribution across the dowel.
Step Four: Plan Your Pattern
Think about what you want your wall hanging to look like. Do you want a simple pattern? Do you want something more complex?
For beginners, a simple pattern works best. Use square knots across the row. Leave some strips loose between the knots. This creates a diamond pattern. You can also make a spiral by using only half knots.
Step Five: Tie Your Knots
Start from the left side. Take four strips. Tie a square knot. Move to the next four strips. Tie another square knot. Continue across the row.
When you finish the first row, start the second row. Move two strips to the right. Take four strips from the new position. Tie another square knot. This staggers the knots. It creates a beautiful woven look.
Keep tying rows until you reach your desired length. You can stop early for a smaller piece. You can add more rows for a larger piece.
Step Six: Finish The Bottom
You have options for finishing the bottom. You can leave the strips loose. This creates a fringe effect. Fringe looks casual and modern.
You can tie a row of knots at the bottom. This gives a clean edge. Some people add beads to each strip. This adds weight and decoration.
Cut the bottom edge straight if you want a crisp finish. Use your scissors to trim all strips to the same length. You can also cut them at an angle. An angled cut adds visual interest.
You May Also Like: Embroidery Hoop Wall Fashion Decor Ideas
More Project Ideas For Fabric Strips
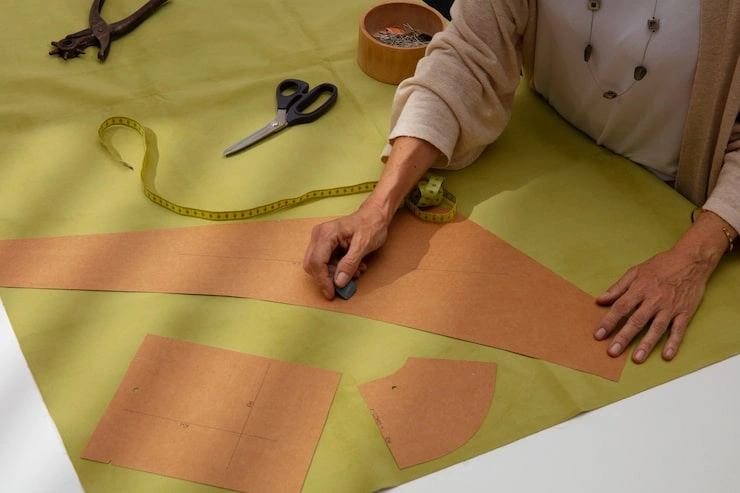
Once you master the wall hanging, you can make many other things. These projects use the same basic knots. They just change the shape and easy macrame with fabric strips.
Plant Holder
This is a popular macrame project. You make a cradle for your plant pot. Hang it near a window.
Use a metal ring for the top. Attach your fabric strips with Lark's Head knots. Group the strips into four sections. Tie square knots in each section. Continue for several inches. Then tie all the strips together. This creates a net that holds the pot.
Test your plant holder before putting a plant inside. Put an empty pot in first. See if the knots hold. Add weight slowly. Make sure everything is secure.
Headband
Fabric strips make a soft, comfortable headband. This is a quick project. You can finish it in thirty minutes.
Cut three long strips of fabric. Braid them together. Tie the ends. You have a simple headband. You can also macrame a headband. Use the half knot to create a spiral. This takes a bit longer but looks special.
Tree Decoration
Small macrame pieces look lovely on a holiday tree. They also make nice gifts. Use thin strips for a delicate look.
Cut your strips into small pieces. Make tiny wall hangings with a small stick. These can be ornaments. You can also make miniature plant holders. These hold small air plants.
Keychain
A macrame keychain is easy to make. Use a metal ring as your base. Attach a few strips with Lark's Head knots. Tie square knots for a short section. Add a bead at the bottom. Trim the ends. Attach your keys.
Bag
This is a bigger project. You need a lot of fabric strips. But the result is worth the effort. A macrame bag is strong and unique.
Create a flat rectangle using square knots. Fold it in half. Sew or tie the sides together. Add handles made from braided strips. You can keep this bag for yourself or give it as a gift.
Tips For Beginners
These tips will help you avoid common problems. They come from people who have made many macrame projects.
Start Small
Do not make a huge project first. Start with a small wall hanging. This lets you practice the knots. You will finish faster. You will feel proud of your work.
A small project teaches you everything you need. You learn how to cut strips. You learn how to tie knots. You learn how to finish your work. Then you can try bigger things.
Cut Extra Strips
Cut more strips than you think you need. You might make mistakes. You might want to try a different pattern. Having extra strips gives you freedom.
Extra strips also help if you make a mistake cutting. You can start over without running out of fabric. This reduces stress. You can focus on learning.
Check Your Tension
Tension means how tight you pull your knots. Consistent tension makes neat work. Loose knots look messy. Very tight knots are hard to undo.
Pull each knot with the same pressure. Not too loose. Not too tight. You will find the right balance with practice. Your fingers will remember the feeling.
Take Breaks
Your hands can get tired. This is especially true for beginners. The knots require small movements. Your fingers do not use these movements often.
Take breaks every thirty minutes. Shake out your hands. Stretch your fingers. Look at your work from a distance. This helps you see the overall effect. You notice things you missed up close.
Use A Hook
A hook on the wall makes a big difference. You can work standing up. Your work hangs at eye level. This is much better than working in your lap.
You see the knots clearly. Your hands move naturally. The tension stays even. A hook is cheap and easy to install. Some people use a bathroom towel hook.
Learn From Mistakes
Everyone makes mistakes when learning. That is normal. Do not get frustrated. Untie the knot and try again. Fabric strips are forgiving. You can usually fix errors.
Sometimes you cannot fix a mistake. You might need to cut a strip and start that section over. That is fine. Consider it part of learning. Each mistake teaches you something.
How To Take Care Of Your Macrame?
Fabric macrame needs different care than cord macrame. The fabric is softer. It can attract dust. It might stretch over time.
Dusting
Your wall hanging will collect dust. This is normal. You can remove dust with a gentle shake. Take it outside and shake it well. You can also use a hairdryer on cool setting. Blow the dust away.
Do not use a vacuum cleaner. The suction can stretch the fabric. The strips might pull out of shape. Gentle methods work best.
Washing
You can wash some fabric macrame. Use cold water. Use a mild soap. Soak for a few minutes. Do not scrub. Do not twist. Rinse with cold water.
Lay flat to dry. Do not hang wet macrame. The weight of the water stretches the fabric. Lay it on a towel. Let it dry completely before hanging again.
Storing
When you are not using your macrame, store it flat. Do not fold it sharply. Folds can become permanent in fabric. Roll it up instead. Put it in a drawer or box.
Keep it away from direct sunlight. Sun fades fabric colors. It can also make some fabrics weak. A cool, dark place is best.
Troubleshooting Common Problems
Every crafter faces problems. Here are solutions to common issues.
Strips Are Twisting
Fabric strips twist as you work. This is normal. You can straighten them with your fingers. Gently run your hand down each strip.
If twisting is bad, try cutting wider strips. Wider strips twist less. You can also iron your strips before using them. This makes them lay flat.
Knots Are Uneven
Uneven knots happen when tension varies. Check your tension as you work. Pull each knot with the same force.
You can also go back and adjust knots. Gently pull on the strips to even things out. This works best on simple patterns.
Fabric Is Fraying
Some fabric frays at the edges. Cotton does not fray much. But other fabrics might. You can stop fraying by sealing the edges.
Use a clear fabric glue on the edges. Let it dry before cutting. This stops the fabric from unraveling. You can also use a lighter to melt the edges. This only works on synthetic fabric.
Strips Are Not Long Enough
You might run out of length before finishing. This happens when you cut your strips too short. You can connect new strips to the ends.
Use the connection method described earlier. Overlap the ends and cut small slits. Put one slit through the other. Pull tight. This adds length without showing a lump.
Project Is Curling
Your project might curl at the edges. This happens when tension is tighter on one side. Check your knots on both sides. Make them even.
You can also block your macrame. This means wetting it and pinning it flat to dry. The project holds its new shape when dry.
Frequently Asked Questions
Can I use any fabric?
You can use many fabrics. Cotton works best. T-shirts are perfect. Sheets are good. Towels can work but they are thicker. Avoid silk, denim, and heavy wool.
How long does it take?
A small wall hanging takes about two hours. A big project might take a whole day. Start small and see how long it takes you.
Do I need to know how to sew?
No. Macrame uses knots. You do not need a needle or thread. You do not need a sewing machine. Anyone can learn.
What if I make a mistake?
Untie the knot and try again. Fabric strips are flexible. You can redo mistakes many times. Cutting strips gives you fresh starts.
Can children learn this?
Yes. Children can learn simple knots. The Lark's Head knot is easy for small fingers. Make sure they use scissors safely. An adult should help with cutting.
How do I hang my finished piece?
Put a nail in the wall. Hang the dowel or ring on the nail. You can also use a sticky hook. Make sure the hook is strong enough for the weight.
Can I use dyed fabric?
Yes. Colored fabric adds beauty to your work. Be careful with dark colors. They might stain your hands as you work. Wash colored fabric before cutting.
What about stretchy fabric?
Stretchy fabric like jersey is great. It is soft and easy to tie. It does not fray. The knots stay tight. This is probably the best choice for beginners.
Where do I find fabric?
Look in your closet. Ask friends and family. Check thrift stores. Old t-shirts are everywhere. People have too many. They will gladly give you some.
Final Thoughts
Macrame with fabric strips is a craft for everyone. You do not need special skills. You do not need expensive supplies. You just need the desire to make something beautiful.
The first project might not look perfect. That is okay. Each project gets better. Your hands learn the movements. Your eyes learn the patterns. Soon you will create pieces that amaze your friends.
Start with the wall hanging in this guide. Follow each step. Take your time. Enjoy the process. The rhythm of tying knots is calming. Many people find it relaxing. It is a break from screens and noise.
Remember that you are doing something good. You are using material that would be thrown away. You are creating art with your own hands. You are learning an old craft in a new way.
Gather your old t-shirts. Find a stick in your yard. Start cutting your strips. Your first macrame project is waiting for you. The knots are simple. The result is beautiful. You can do this.
Easy Handmade Gifts For Beginners
Upcycled Coffee Mug with Cricut Joy